
This article outlines in detail the steps you need to take to get your own Twitter API keys from start to finish.
This process can be divided into two main parts.
- First is the process for applying for a developer account
- Second is to create an app with Twitter
Though this article is written primarily for the users of our WordPress Twitter Feed plugin. But anyone can follow the steps to obtain the API keys for their own purposes.
For the users of our plugin, you need these keys to use with our “My Custom Twitter Feed” plugins. Both free and the pro version needs these keys to generate an access token, also known as a bearer token. Which is then used by our Twitter plugin to fetch Tweets and display on your website.
Our plugin uses the newer Twitter API v1.1 and OAuth 2.0 to work. Though the process of generating the API keys involves a bit of work on your part, then, in the long run, you obtain a set of keys that are your own.
This is important because each Twitter application has a limit to the number of Tweets it can fetch from Twitter in an hour, and in a day. If you are sharing someone else’s access tokens, which may be shared by others, there is a probability that you would hit the upper cap limit and your applications stop working for some time until the limitation expires.
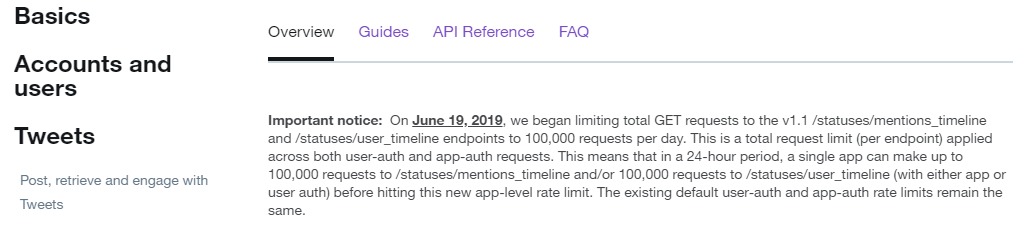
As you can see in the screenshot taken from the Twitter Developer portal. A single app can make up to 100,000 requests to Twitter for fetching Tweets using its API.
Therefore, it is a good idea to generate your own Twitter API keys to be used for displaying Tweets on your website.
With that, let’s get started with the steps involved in this process.
1. Apply for a Developer Account

You need a developer account to be able to access the Twitter API keys and tools. So go to https://developer.twitter.com/ and click on the “Apply” button on the top corner of the site.
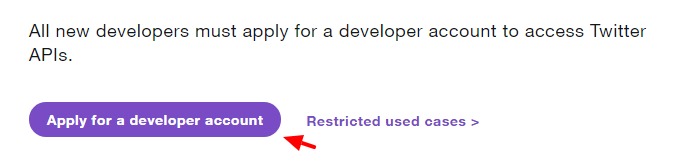
Click on the button that says, “Apply for a developer account”. Next, you will be presented with this screen below.
It has many options, but the one that makes the most sense to me is to choose “Doing something else”.
Most of the other options imply that you will be developing an app or something. However, we just need the API keys to be used with an existing plugin.
However, you can choose a different option depending on your needs & understanding.

Click on “Next” at the bottom of the page and you are presented with a similar screen as below.
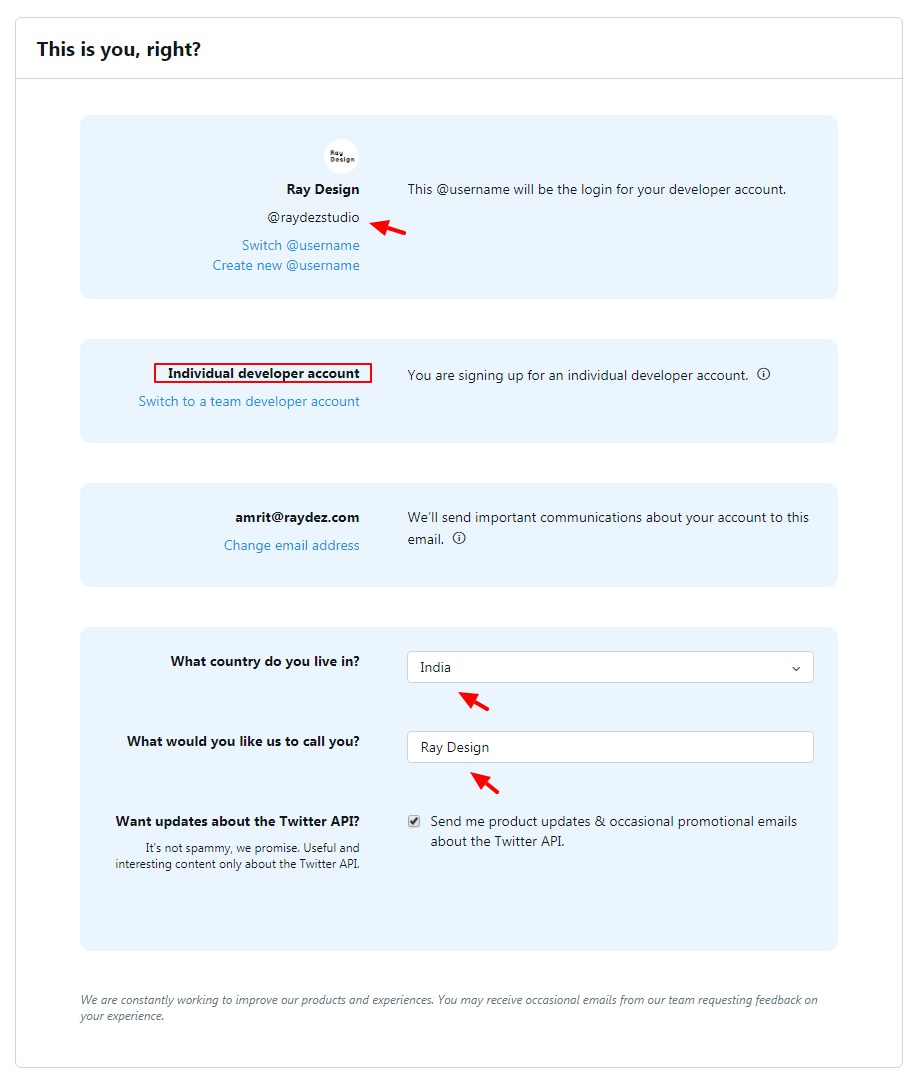
It tells you a little bit about the type of developer account you are signing up for. And it also asks for your country and the name you should be addressed with.
Hitting “Next” takes you to the screen below. It asks you a few questions about how you intend to use Twitter data.
I have attached a screenshot of the page with my sample responses and the options I selected. Please think of it as a guide only and choose the options that apply to you.
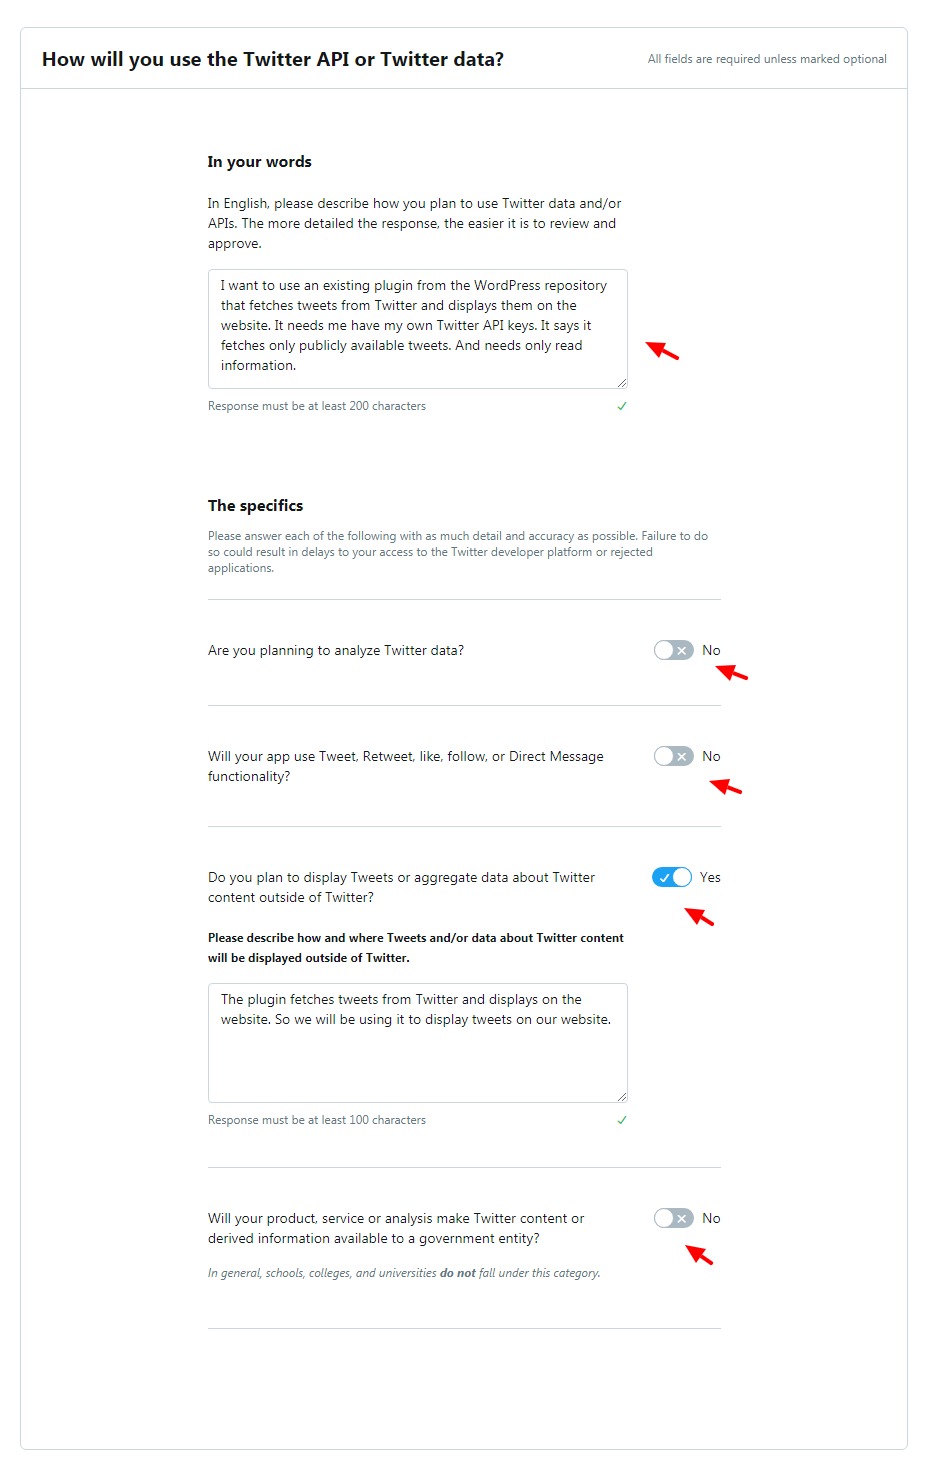
Once you are happy, you can click on the “Looks good!” button.
The next screen is the developer agreement policy. It says, please review and accept. You can go through the agreement if you like.
Then tick the checkbox for accepting the developer agreement. And finally, click on “Submit Application”.
Then you are presented with a screen like this. It says, “You did it!! Thank you for applying for access to a Twitter Developer Account”.
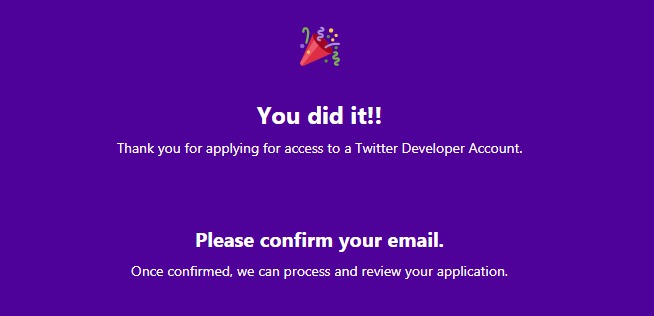
As it says, you still need to confirm your email that Twitter has sent you. Once you do that, then Twitter will review your application.
And once you click on the “Confirm your email” link you are taken to the Twitter developer site and presented with the screen below.

As you can see it says, “Congratulations! You have successfully created a new Twitter developer account. With this account, you now have access to new APIs, app management, and tools to facilitate and support development.”
This didn’t take more than a few minutes of our time. Now we can proceed to create an app. Once this step is taken care of, we will have the API keys we need to use with our Twitter plugin.
I will guide you along. Let’s proceed.
2. Creating an App
Now that we have a developer account, we can proceed with creating a new app on Twitter. You will notice that the menu items on the top right corner of the screen have now changed to “Dashboard” & “Ray Design”.
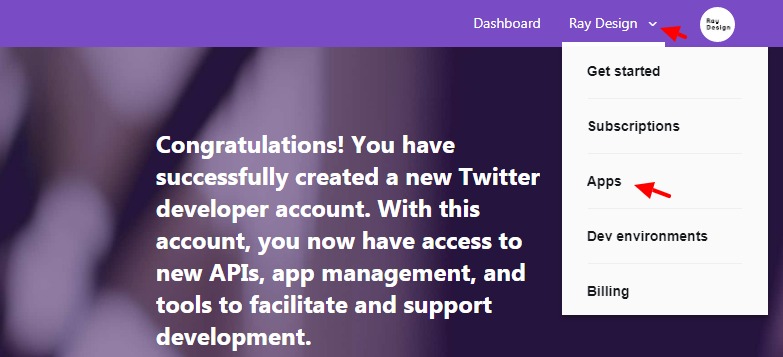
You will have your name in place of “Ray Design” of course. Now click on the dropdown arrow next to your name. And you see this menu item. We want to create a new app, so we will click on the “Apps” menu item.
We are taken to a screen which is more or less empty, as it has no apps yet.
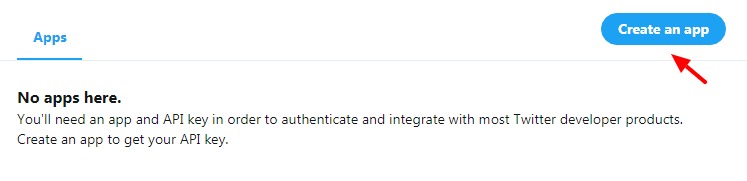
As you can see it says, “No apps here. You’ll need an app and API key in order to authenticate and integrate with most Twitter developer products. Create an app to get your API key.”
And we will do just that. So, click on the “Create an app” button.
Doing so takes us to the screen shown below. It needs you to fill in the details pertaining to your new app. I have filled it in with what I thought were the best answers. Of course, you should modify this with your own needs.
I have also shown you the options that you can leave out.
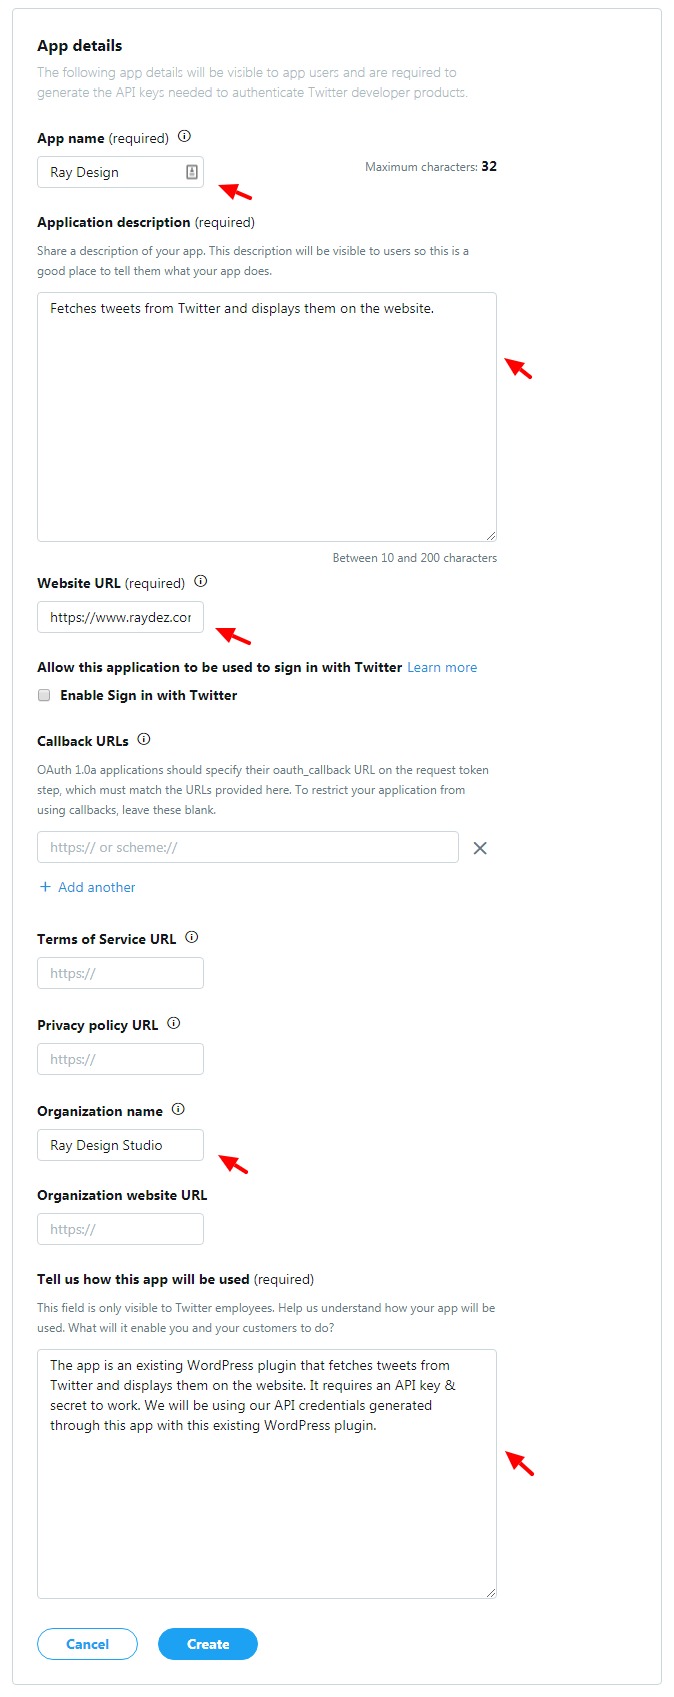
Once done, we will click on “Create” to create the new app.
Then you get a pop up reminding you of the Developer terms that you have agreed to.

You can click on “Create” here to finally create the app on Twitter.
The next screen shows you the App Details.
Click on the “Keys & Tokens” tab to see your API credentials.
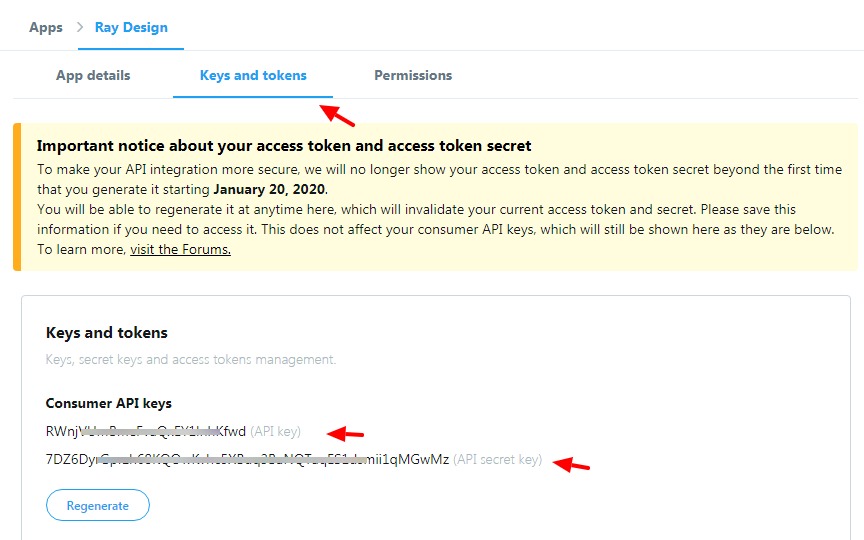
For our Twitter plugin, you only need the Consumer API key & secret. You don’t need to generate the Access tokens. Our plugin will create a bearer token to be used in place of the access tokens.
Congratulations!! So now you have everything you need to start fetching and showing tweets on your website using our Twitter plugin.
Feel free to ask me any questions about the process I have explained above in the comments below.